Have you ever felt frustrated when manually adding borders to all the data in Excel? Wondering how to automatically add borders to cells with data without doing it manually? We’ll show you two incredibly simple methods. Check out the article below!
Nội dung
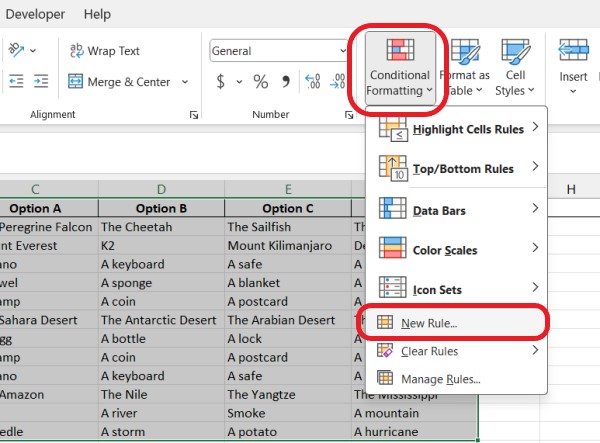
Method 1: Automatically Add Borders to Cells in Excel with New Rule
Step 1: Select the entire data range that you want to outline (this includes cells that already contain data and cells that are blank but you want to automatically outline when new data is entered).
In the Home section on the toolbar, select Conditional Formatting > New Rule…
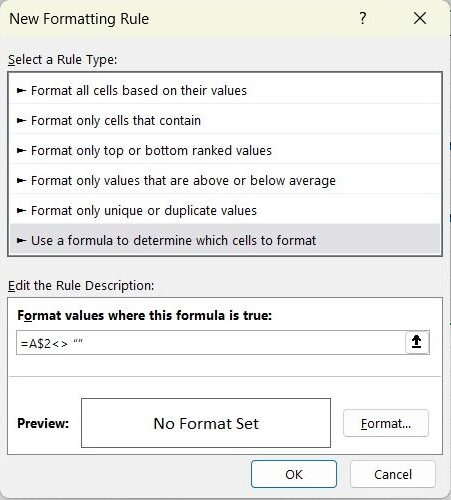
Step 2: A dialog box appears, select Use a formula to determine which cells to format.
Next, enter the formula as shown:
= select the first cell (press F4 twice to freeze the column) <> “”
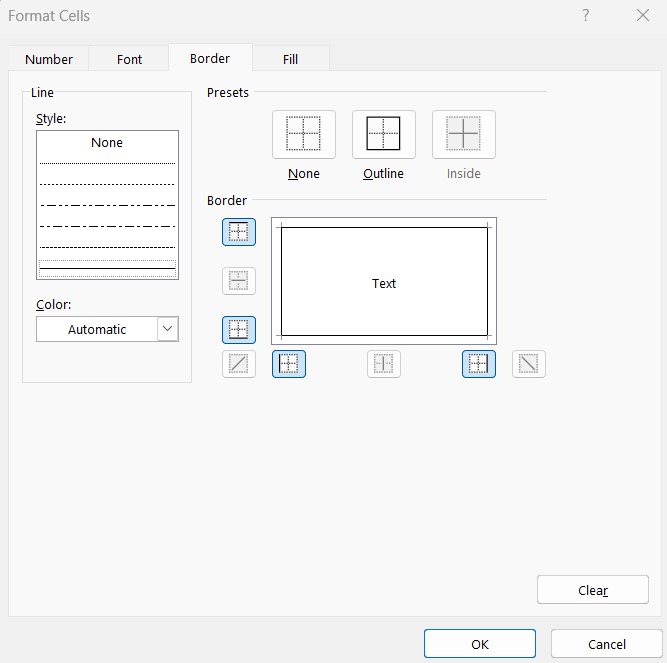
Step 3: Select the Format box to draw the frame.
Step 4: Now a new dialog box appears, select Border. Here you can choose the grid style as desired.
Select OK, then click OK again to complete the process of automatically drawing cells when there is Excel data.
Method 2: Automatically add borders to cells in Excel with shortcut keys
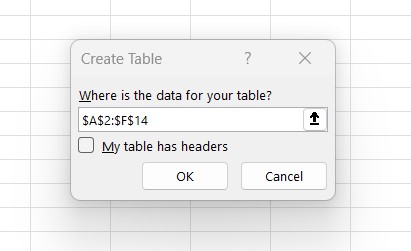 Step 1: Highlight the area you want to outline automatically
Step 2: Press CTRL + T to switch to tablet mode
That’s it, now if you add new data, Excel will automatically outline the cell for you.
Conclusion:So now you know the trick to automatically add borders to cells in Excel! From now on, whenever you enter new data, the table will automatically draw borders without requiring manual work like before. Wishing you success!
See more: Instructions on how to hide and display data in Excel